Logging into eRezLife
- Go to https://masters.erezlife.com/login/.
- On the log-in page, select “Sign in with your school account.”
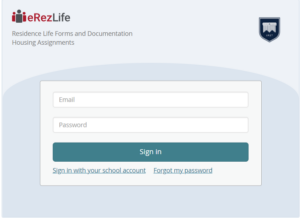
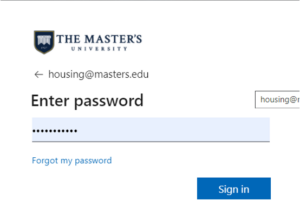
3. Sign in with your TMU email and password.
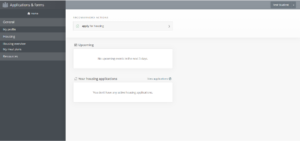
4. Once you log in, you will be brought to the eRezLife homepage.

Logging into eRezLife

3. Sign in with your TMU email and password.

4. Once you log in, you will be brought to the eRezLife homepage.

Housing Applications

2. Select which housing application you would like to complete by clicking “Apply Now” for the appropriate application.
a.If you desire to live in campus-provided housing, choose the 2024-25 On-Campus Application.
b. If you desire to live off-campus, choose the 2024-25 Off-Campus Application.

Off-Campus Application
(If you intend to live in campus-provided housing, please skip to the next section.)
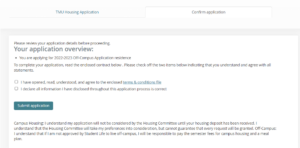
4. Select the two check boxes indicating your understanding and agreement with those statements.
5. Click Submit Application.
6. Once submitted, you will see the following page, indicating
a. The submission of your application
b. A confirmation email sent to your TMU email address
c. Instructions to watch your email for the decision regarding your application so you are aware of any further steps
necessary.
d. An overview of your application.

If at any time, you wish to 1) withdraw or 2) edit your application:
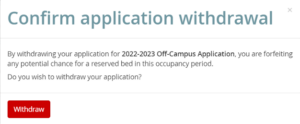
a. Click the “Withdraw” button found under the word “Complete.”

b. Confirm that you desire to withdraw your application.
c. Make sure to complete the Campus Housing Application if you intend to live in campus-provided housing to secure
your place in a bed.
3. If you wish to edit your application:

2. Make any necessary changes and resubmit the application.
3. You will receive an updated confirmation email. Please allow two weeks for processing.
On-Campus Housing Application
(If you have completed the Off-Campus Application, please skip to “Meal Plan Selection” on page 12.)
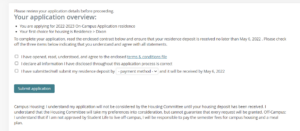
4. Use the drop down menu to select the “Online Payment” method to submit the housing deposit.
a. You will follow the link to pay your $300 housing deposit.
Your application will not be considered until the deposit has been received.
b. Contact with any questions regarding the deposit.
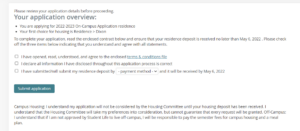
5. Check the boxes next to each of the three statements indicating your understanding and agreement of those three
statements.
6. Click “Submit Application.”
7. Once submitted, you will see the following page, indicating
a. The submission of your application
b. A confirmation email sent to your TMU email address
c. Instructions to watch your email for the decision regarding your application so you are aware of any further steps
necessary.

8. Please check your TMU email for your unique link to pay your one-time, nonrefundable $300 housing deposit.
a. IMPORTANT: Your housing application will not be considered until your housing deposit has been received.
b. Please allow at least 24 hours for your application to be updated with the receiving of your payment.
If at any time, you wish to 1) withdraw or 2) edit your application:
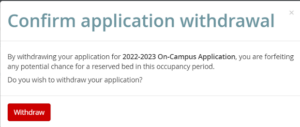
a. Click the “Withdraw” button found under the word “Complete.”

b. Confirm that you desire to withdraw your application.
3. If you wish to edit your application:
a. Click the “2023-2024 On-Campus (Spring Term) Application” link.
b. At the top of the screen, click the link that allows you to edit the application.
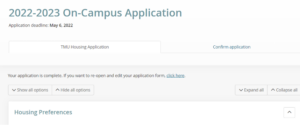
c. Make any necessary changes and resubmit the application.
d. You will receive an updated confirmation email.
Roommate Profile and Groups
Once you have completed your On-Campus Housing Application, you may choose to create a roommate profile and or group.
Please be aware that for both Roommate Searches and Groups, you will only be able to search for those who have completed an application.
Creating a Roommate Profile

2. Complete your profile as thoroughly as you feel comfortable.
3. Once you have finished filling in all the information you desire to provide, make sure to go to the top of the page and click
the checkbox next to “Turn on my profile.”

4. Scroll to the bottom of the page and click “Save.”
a. Please be aware that you can go back and change information on your profile or make your profile invisible at any
time.
5. Once you have made your profile visible, you will have a new tool available called the “Roommate Search” tool. This will
allow you to find and contact with other students that may serve as a good fit as your roommate.
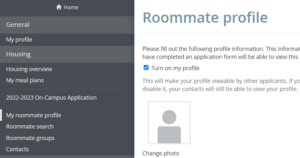
6. Use the categories to select any preferences you may have about your roommate or type in a student’s name in the search
bar at the top of the screen. **Keep in mind ONLY those who have made their profile visible will appear in this list.
7. Below you will see a list of students who fit the criteria you selected, including a photo and the ability to view their complete profile. You
can choose to do the following:
a. Add them to a roommate group.
b. Send them a contact request so you can see if you would like to room together.
Creating Roommate Groups

You will be taken to this page, where you will have the option to create a new roommate group or accept an invitation to join a roommate group.
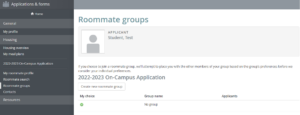
2. To create a new roommate group:
a. Click Create New Roommate Group
b. Create a group name
c. Type in the TMU email address of each individual you would like to be part of your group.
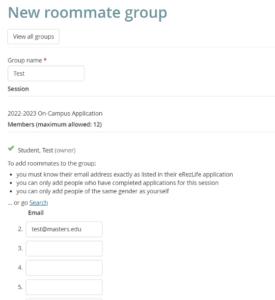
d. Click Save. This creates the groups and sends an invitation to those in your group.
e. As each member accepts, you will see a green checkmark appear next to their name.
To Accept an Invitation to a Roommate Group

3. To indicate whether you would like to join a roommate group or not, click the circle to the left of the
option you want to choose to make it show a green checkmark. You also have the option to create your
own roommate group using the instructions above.
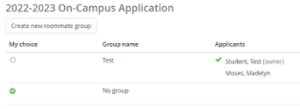
This process will help create a more streamlined process for the Student Life Housing team when they complete placements as they will know that you and your roommate(s) mutually agree to room together.
However, this does NOT guarantee that you will receive your preferences, though they seek to take this into consideration as much as possible.
Meal Plan Selections
Once you have submitted your on-campus or off-campus housing application, you will be able to select a meal plan.
IMPORTANT! When you initially apply for housing, you will only see the following meal plan options:
Once you 1) receive approval for your off-campus housing application or 2) receive your housing placement, you will be able to return to eRezLife to change your meal plan to one that is exclusive to certain living situations. These are as follows:
Please allow 24 hours for your bill to be updated with Student Accounts.

2. Under Current Sessions, click “Select Meal Plan for this Session,” under the heading of the application
you plan to proceed with for the upcoming school year.
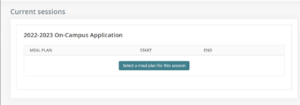
3. Select the Meal Plan option you would like and click “Save.”
4. If at any point you desire to change your meal plan (such as after being approved for Off-Campus or placed in Oak Manor, or the Canyon Homes), please email and they can make that change for you.
Note: With any meal plan selections or changes, please give at least 24 hours for your bill to be updated.
IMPORTANT: If you do not choose a meal plan prior to the start of the semester, you will be billed for a meal plan by default and will be responsible for those charges.
Other Helpful Information

The Master’s University and Seminary admit students of any race, color, national and ethnic origin to all the rights, privileges, programs, and activities generally accorded or made available to students at the school. It does not discriminate on the basis of race, color, national and ethnic origin in the administration of its educational policies, admissions policies, scholarship and loan programs, and athletic and other school-administered programs.
21726 Placerita Canyon Road
Santa Clarita, CA 91321
1-800-568-6248
© 2024 The Master’s University Privacy Policy Copyright Info
| Cookie | Duration | Description |
|---|---|---|
| cookielawinfo-checkbox-analytics | 11 months | This cookie is set by GDPR Cookie Consent plugin. The cookie is used to store the user consent for the cookies in the category "Analytics". |
| cookielawinfo-checkbox-functional | 11 months | The cookie is set by GDPR cookie consent to record the user consent for the cookies in the category "Functional". |
| cookielawinfo-checkbox-necessary | 11 months | This cookie is set by GDPR Cookie Consent plugin. The cookies is used to store the user consent for the cookies in the category "Necessary". |
| cookielawinfo-checkbox-others | 11 months | This cookie is set by GDPR Cookie Consent plugin. The cookie is used to store the user consent for the cookies in the category "Other. |
| cookielawinfo-checkbox-performance | 11 months | This cookie is set by GDPR Cookie Consent plugin. The cookie is used to store the user consent for the cookies in the category "Performance". |
| viewed_cookie_policy | 11 months | The cookie is set by the GDPR Cookie Consent plugin and is used to store whether or not user has consented to the use of cookies. It does not store any personal data. |